Local environment
Installation guide
Install MkBoard Desktop and connect Codex CLI or Claude Code.
Installation Guide
Prepare the environment in this order. After each step, return to MkBoard's local CLI settings page and click the top-level "Rescan" button.
1. Download
Choose the full installer for Apple silicon Mac or Windows 10/11 x64.

2. Configure Agent
MkBoard uses a local Agent on your computer to read the current project and run storyboard splitting, repair, and generation tasks. MkBoard currently supports Codex CLI and Claude Code. Make sure you install the CLI version; installing only the desktop app or editor extension may not be enough for MkBoard detection.
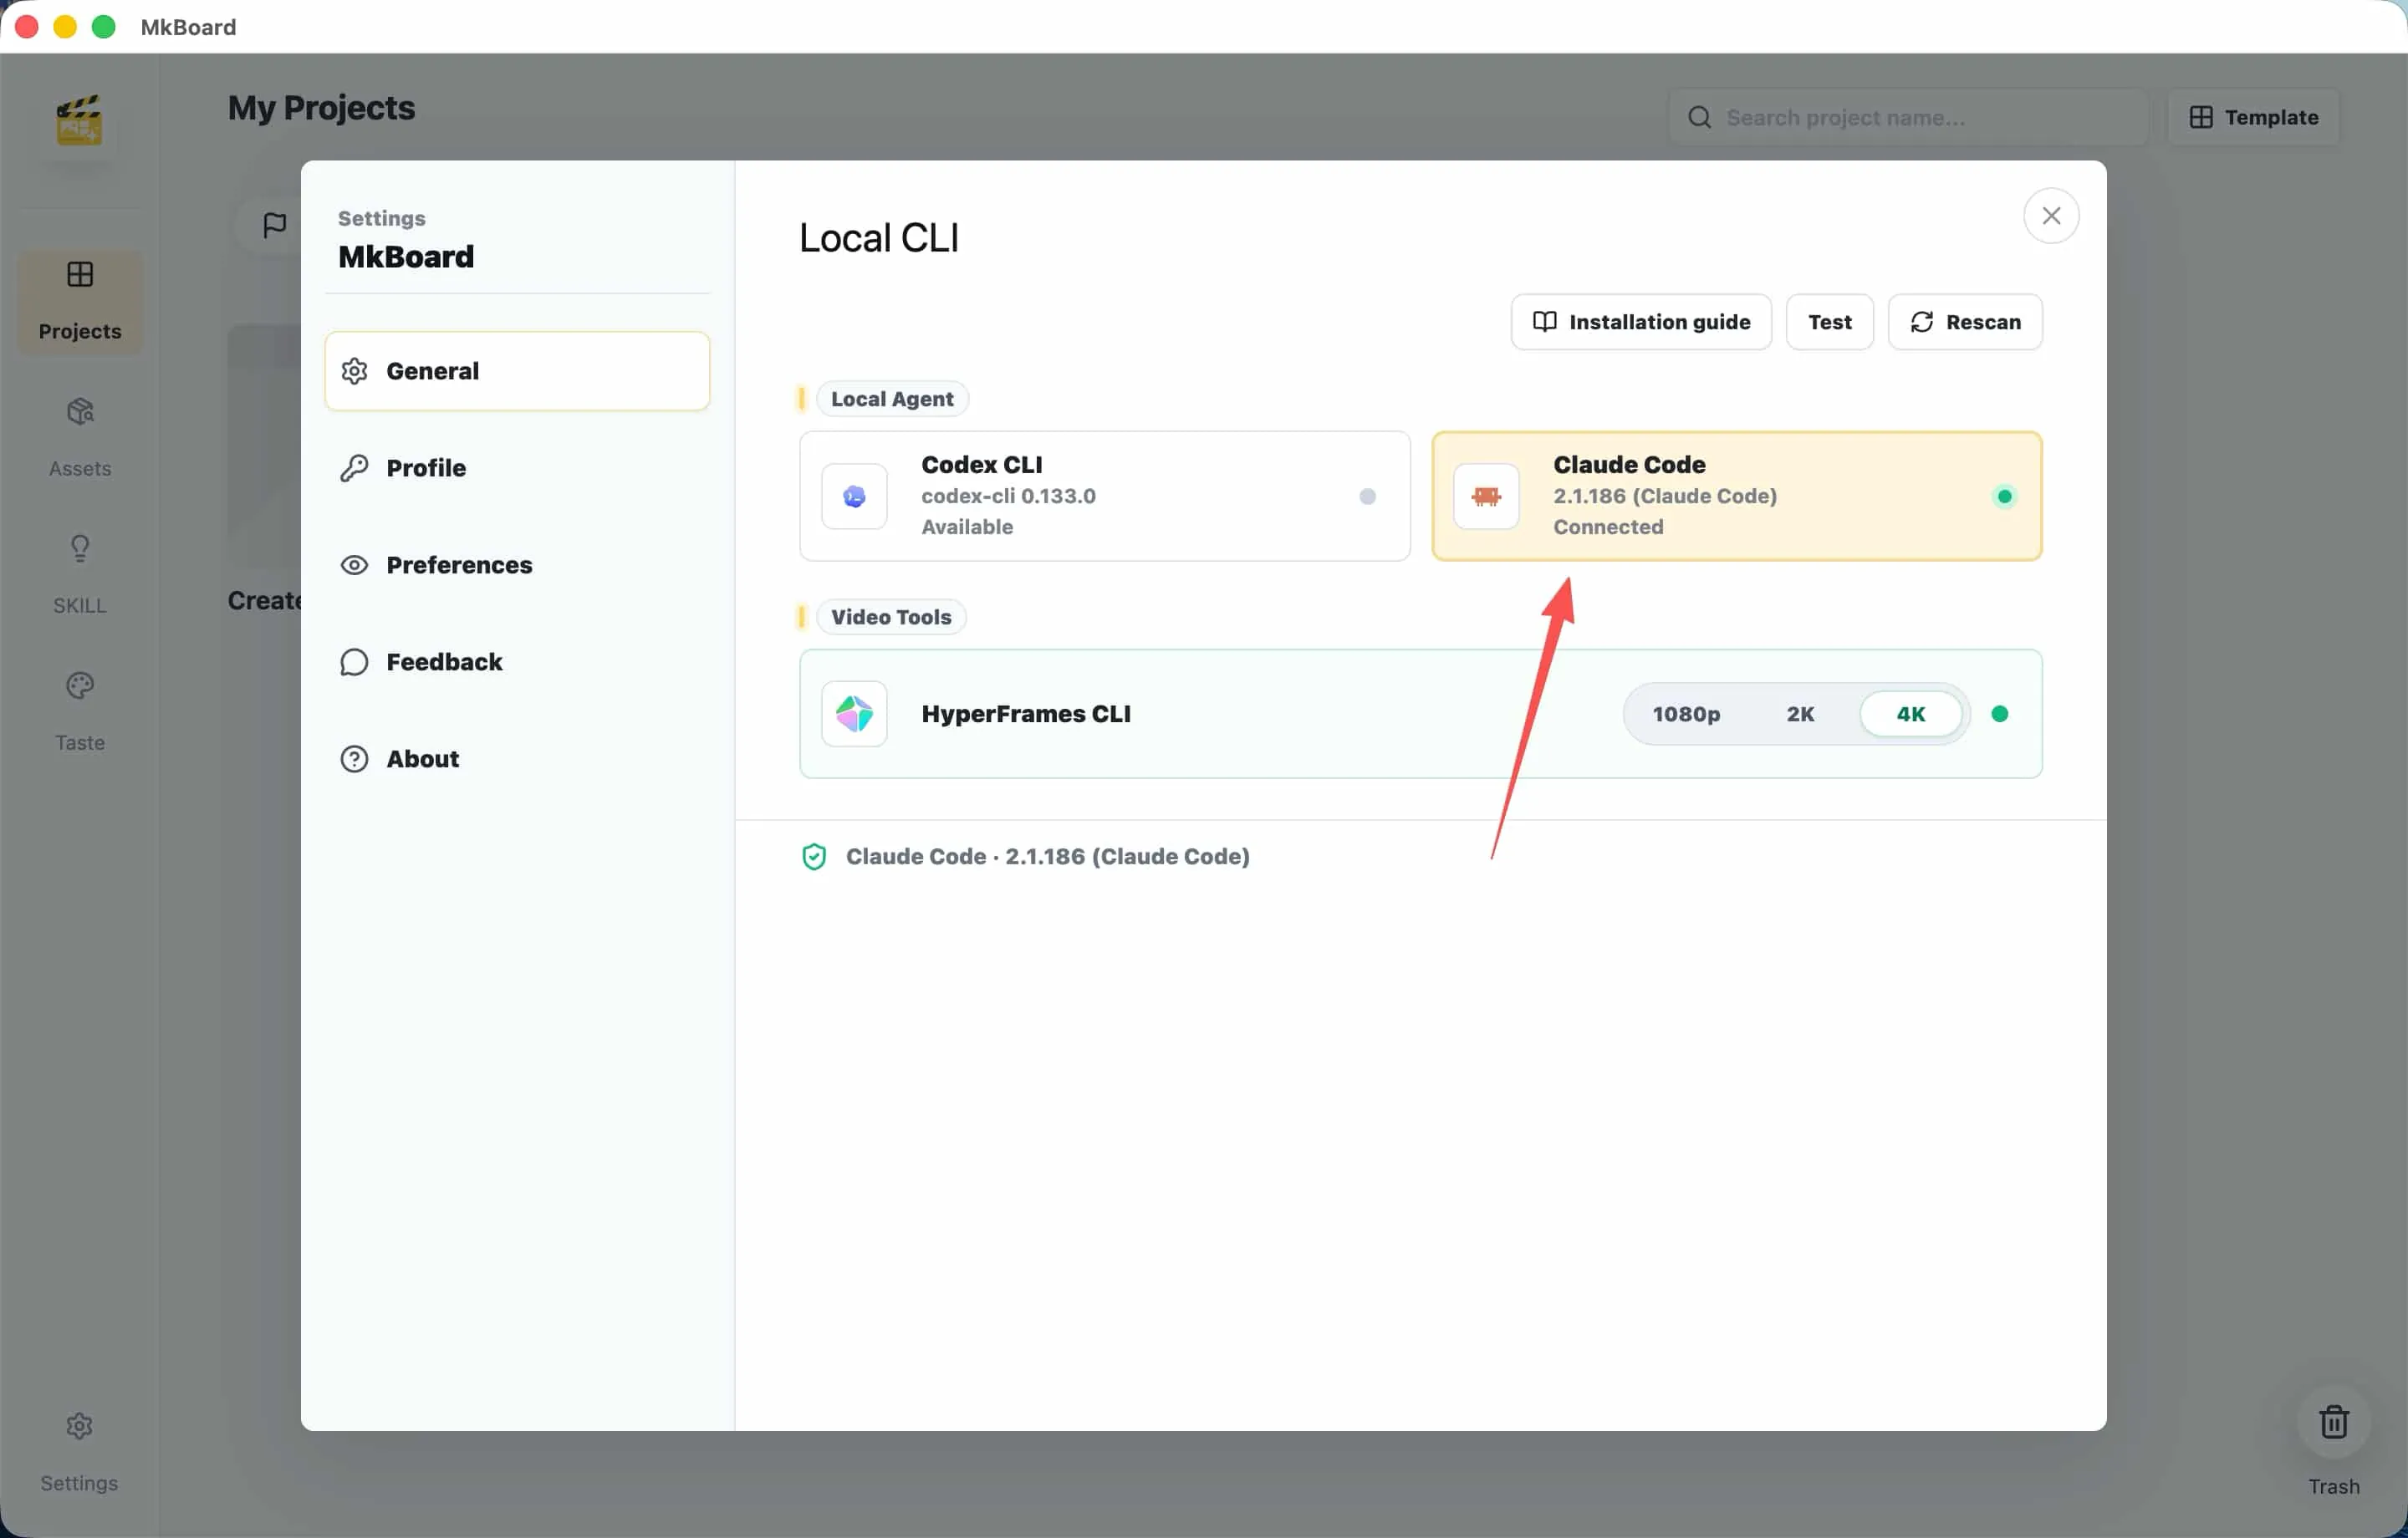
Install and sign in to one local Agent first:
- Codex CLI: follow the official OpenAI setup guide to install the CLI and sign in.
- Claude Code CLI: follow the official Claude Code quickstart to install the CLI and sign in.
After installation, finish sign-in or configuration in your terminal and make sure Codex CLI or Claude Code CLI runs correctly.
3. Check the bundled video runtime
The full MkBoard installer includes HyperFrames CLI, Chrome Headless Shell, FFmpeg, and ffprobe. The Windows installer also includes a pinned Node.js 22 runtime. You do not need to install Node.js, npm, FFmpeg, or HyperFrames, edit PATH, or wait for a first-run runtime download.
After installation, open MkBoard settings and click “Test” for HyperFrames under Video Tools. MkBoard checks the bundled versions, system architecture, and file integrity. If a check fails, reinstall the same full MkBoard installer instead of bypassing the check with global dependencies.
4. Start using MkBoard
After the setup is complete, open MkBoard Desktop and create a project. You can write your script, organize the storyboard, and continue into video drafts.
Need Help
If setup fails, join the Feishu group and include the bundled-runtime check results from Settings.